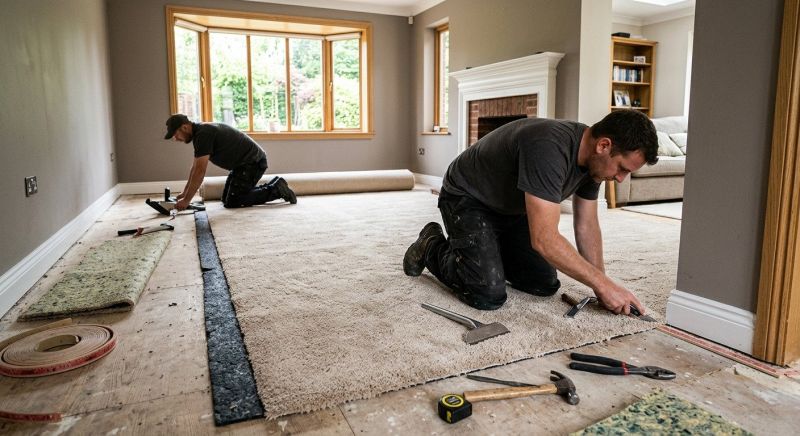
A well-fitted carpet changes how a room feels the moment you walk in. It softens footsteps, warms a cold floor and ties the furniture together. But a carpet only delivers those benefits when it is installed properly. Carpet installation is a skilled job, and the difference between a professional fit and a rushed one shows within weeks: ripples across the middle, edges lifting at the doorway, seams that catch the eye every time you cross the room.
This guide covers the whole process, from measuring the room to looking after the finished floor, so you know what good work looks like and which mistakes to avoid.
Start With Accurate Measuring
Every good installation begins with a tape measure, not a carpet roll. Measure the length and width of the room at its widest points, including doorways, alcoves and bay windows. Rooms are rarely perfect rectangles, so sketch a simple plan and note each wall’s measurement.
Add at least 10 centimetres to each measurement for trimming. It is far better to trim a little extra carpet away than to discover the piece is short at the far wall. For irregular shapes, divide the floor into rectangles on your sketch and measure each section.
Measure door thresholds too. A carpet too thick for the clearance under a door will jam it, and trimming a door after the fact is an avoidable expense.
Choose the Right Underlay
Underlay is the hidden layer that decides how a carpet feels underfoot and how long it lasts. It cushions each step, absorbs sound and protects the carpet backing from wear. Skipping underlay, or choosing a thin one to save money, is one of the most common false economies in flooring.
For bedrooms and living rooms, a good quality foam or felt underlay of 10 to 12 millimetres works well. In busy hallways and stairs, choose a denser underlay that will not flatten quickly under constant foot traffic. Lay the underlay in the opposite direction to the carpet above it, and tape the joints so it does not shift during fitting.
Prepare the Subfloor
Before any carpet goes down, the subfloor must be clean, dry and level. Sweep away dust and debris, pull out old staples and nails, and check for loose floorboards that squeak. Fill holes and sand down high spots, since any unevenness will show through the carpet over time.
On concrete floors, check for damp. Moisture trapped under a new carpet causes smells and damages the backing. If the floor feels damp or shows dark patches, fix the source first and let the floor dry completely.
Stretch-In Fitting: The Standard Method
Most wall-to-wall carpet in homes is fitted using the stretch-in method. Gripper rods, thin strips of wood with angled pins, are fixed around the perimeter of the room, about 6 millimetres from the skirting board. The underlay is laid inside the gripper frame, and the carpet is stretched over it and hooked onto the pins.
A power stretcher is the proper tool for this job. It pushes the carpet taut across the whole room so it lies flat without ripples. A knee kicker is for finishing edges and tight corners only; carpet stretched with a knee kicker alone will almost always develop waves within a few months.
Once stretched, the excess is trimmed with a sharp knife and tucked behind the gripper rod, leaving a clean edge along the skirting board.
Glue-Down Fitting: When It Makes Sense
Gluing the carpet directly to the subfloor suits commercial spaces, rooms with heavy wheeled furniture, and stairs, where stretching is impractical.
Preparation matters even more with this method, because the adhesive bonds to whatever is underneath. The floor must be smooth, dry and free of dust, and the correct adhesive for the carpet type and subfloor must be used. The carpet is rolled out, folded back halfway, adhesive is spread evenly, and the carpet is pressed into place before the adhesive sets.
Handling Seams and Doorways
Seams are where two pieces of carpet meet, and a good fitter makes them almost invisible. The two edges should be cut straight, butted tightly together and joined with heat-activated seam tape from underneath. The pile direction must match on both sides, otherwise the join will catch the light differently and stand out.
Plan seams away from the main traffic path and away from direct window light, where they are hardest to spot. At doorways, the carpet should finish neatly under the door with a threshold bar, which protects the edge and gives a tidy transition to the next room.
Common Mistakes to Avoid
The most frequent mistake is poor measuring, which leads to short pieces, wasted carpet or seams in awkward places. The second is skimping on underlay, which makes even an expensive carpet feel cheap and wear out faster. The third is inadequate stretching, which causes ripples that cannot be fixed without re-fitting.
Other mistakes include ignoring the pile direction, so the carpet looks a different shade from each end of the room, and fitting carpet over a damp or uneven subfloor. None of these are expensive to prevent, but all of them are expensive to fix after the carpet is down.
Aftercare: Keeping the Fit Looking New
Vacuum regularly in the first weeks so the pile settles evenly, and keep heavy furniture off freshly stretched areas for 24 hours if you can. A little loose fluff at first is normal and will stop as the carpet beds in.
Deal with spills quickly by blotting, never rubbing, and use a cleaner suitable for the fibre type. Heavy furniture should sit on protective pads to prevent dents in the pile. With regular vacuuming and a professional clean once a year, a properly fitted carpet will look good for many years.
Good installation is mostly invisible. You notice it only when it is missing, in the ripple across the floor or the edge that keeps lifting. Get the measuring, underlay, stretching and finishing right, and the carpet simply does its job quietly for years. For professional fitting done to that standard, see https://www.carpetshopdubai.com/carpet-fitting.php.